Measure width at three heights (bottom, middle, top), height at two points, check plumb on both walls, and verify the opening is square using diagonal measurements. Use the smallest width measurement as your glass dimension and add manufacturer-specified clearances. Always measure after tile work is 100% complete — tile and grout change the opening dimensions.
Measuring a shower opening for a custom glass door is one of those tasks that looks simple until you discover that shower walls are almost never perfectly plumb, parallel, or square. A 1/8-inch error can require full panel replacement, because tempered glass cannot be cut or adjusted after fabrication. This guide walks through each measurement step in the order a professional glass technician follows — including the checks that prevent the expensive mistakes.
What Tools Do You Need to Measure a Shower Opening?
A tape measure, a 4-foot level, and a framing square are the minimum tools for an accurate shower door measurement. Professional glass technicians add a laser level for height verification and a digital angle finder for checking wall plumb precisely. For DIY pre-measurement (to estimate costs before calling a glass company), a tape measure and level are sufficient.
Tool list:
- Tape measure (25-foot minimum — the extra length gives you a firm, non-bowed measurement on tall openings)
- 4-foot level (for checking wall plumb — a 2-foot level is too short to detect gradual out-of-plumb walls)
- Framing square or speed square (for checking the 90-degree corner between wall and floor or threshold)
- Pencil and paper or smartphone (record every measurement immediately — don't trust memory)
- Ladder or step stool if the shower is tall (72" or more requires a stable platform for comfortable top measurements)
Optional but useful for precision:
- Laser level — projects a perfectly vertical or horizontal reference line, faster than holding a level at multiple positions
- Digital angle finder — displays the exact degree of out-of-plumb rather than requiring visual estimation against a level bubble
- Folding rule — rigid, easier to hold plumb across a horizontal opening than a flexible tape
Never measure before tile work is complete. Tile and mortar bed add 3/4" to 1-1/4" to each tiled wall — measuring on unfinished walls guarantees incorrect dimensions. The glass fabricator needs the finished, tiled opening dimensions.
Step 1 — Measure the Width at Three Heights
Measure the width of the shower opening at three points: near the floor, at mid-height, and near the top. Record all three measurements separately. Use the smallest measurement as your glass dimension — this is the narrowest point the glass must pass through, and the dimension that determines fit. A difference of 1/4 inch or more between your three width measurements signals out-of-plumb or bowed walls that require special handling.
How to take width measurements accurately:
Hold the tape measure horizontal across the opening at each height — don't angle it. Angling a tape measure in a shower opening produces a longer reading than the true horizontal distance.
For a standard alcove shower with two side walls and a back wall, measure the distance between the two side walls at:
- Bottom: Approximately 2 inches above the threshold or floor
- Middle: Approximately 36 inches from the floor
- Top: Approximately 6 inches below the finished ceiling or header position
If you're measuring for a frameless swing door with a fixed panel, identify which dimension represents the door opening (the pivot side) and which is the fixed panel. Both widths need to be captured.
Recording your measurements: Write them down in this format: Bottom 35-7/8", Middle 36-1/16", Top 36". Use fractions rather than decimals — glass fabricators work in fractional inches, not decimal inches.
1/8 inch
— the measurement error tolerance that can cause leaks or misfits requiring full panel replacement on a custom frameless shower door ([Sunny Shower](https://www.sunnyshowerus.com/))
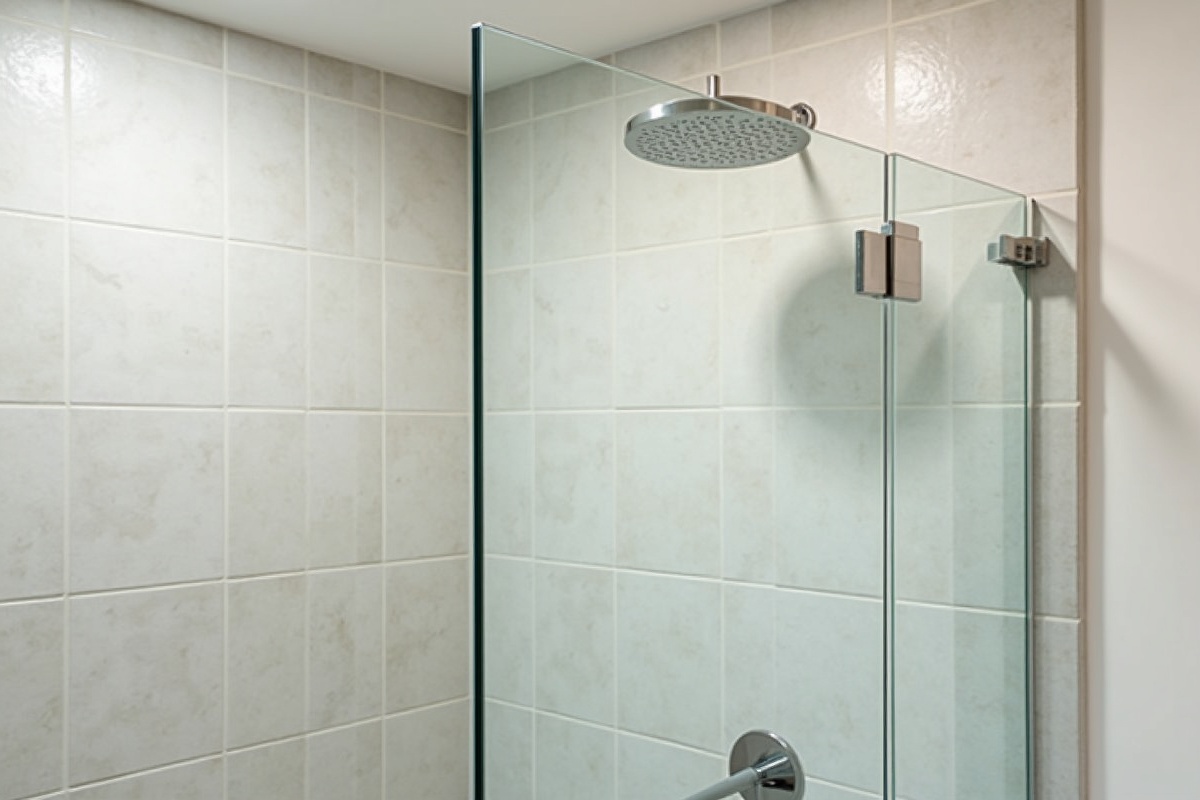
Step 2 — Measure the Height From Floor to Header
Measure the opening height from the top of the threshold (or floor at the entry point) to the intended glass top position. For frameless enclosures, the glass typically terminates at a header or at a pre-determined height based on the bathroom ceiling, steam containment requirements, or design preference. Measure at the left edge, center, and right edge of the opening.
Height measurement specifics:
Starting point: Measure from the finished threshold surface — not the rough floor beneath it. If a prefabricated threshold is being installed as part of the project, get its finished height and subtract it from your measurement (the glass sits on or against the threshold, not the subfloor).
Ending point: The glass top position depends on whether you have a header bar, a clip-mounted frameless top, or a free-standing frameless panel. Confirm the target height with your glass company before measuring, as different hardware systems have different installation requirements.
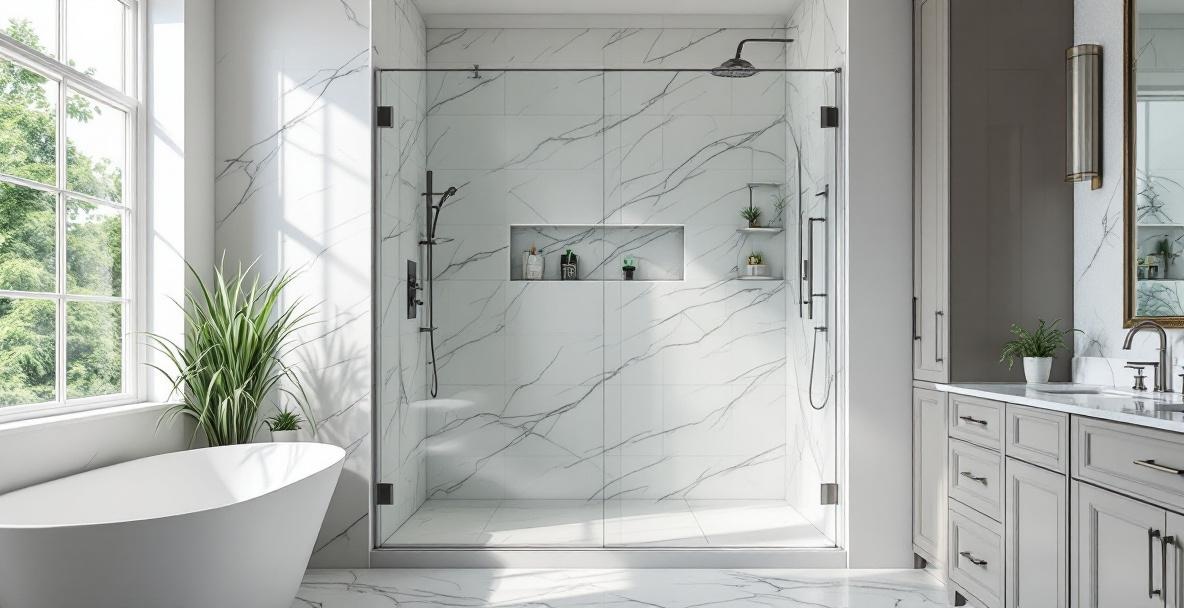
Standard frameless shower heights: Most residential frameless installations run 72–76 inches from the threshold to the glass top. Custom installations can reach 84–96 inches or higher for floor-to-ceiling enclosures.
For an alcove shower, measure height at the left wall, center, and right wall. A difference in height between the three points indicates a sloping floor or inconsistent threshold — information the fabricator needs to accommodate the gap with a seal rather than a tight-cut bottom edge.
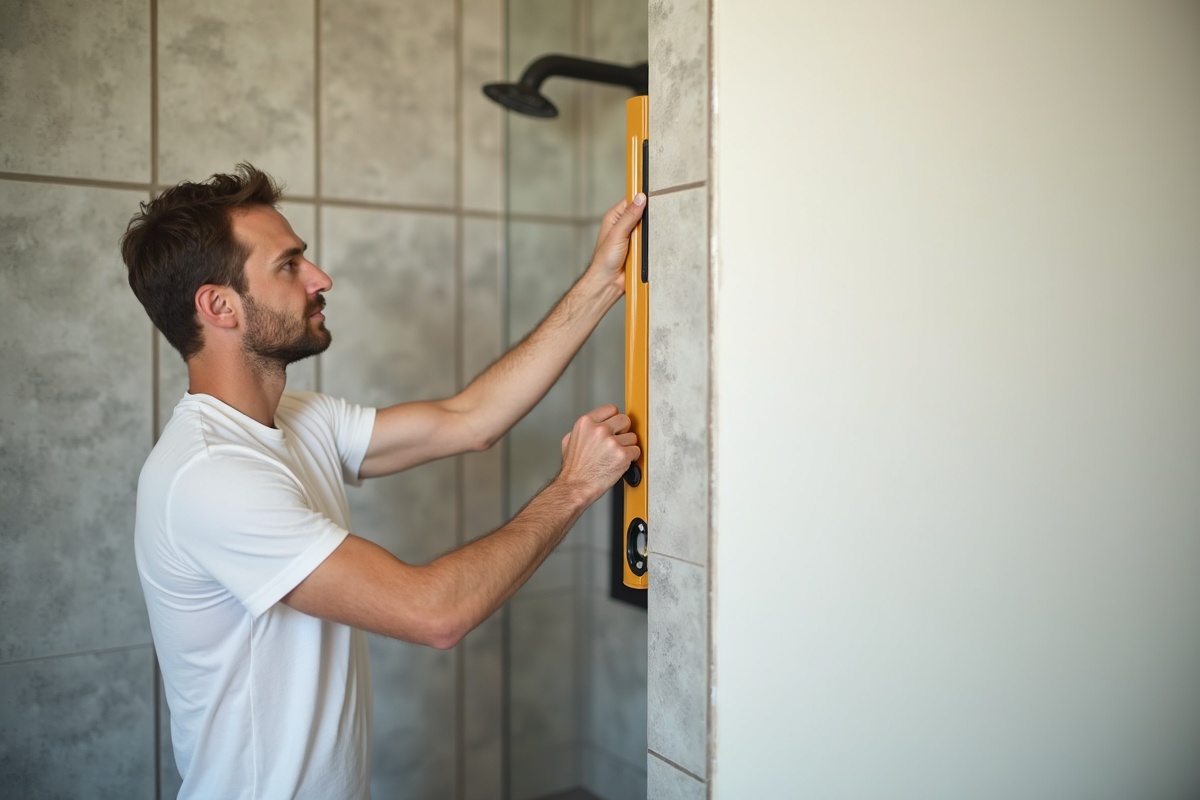
Step 3 — Check Whether Walls Are Plumb
Hold a 4-foot level vertically against each wall surface and check the bubble. A plumb wall shows the bubble centered. An out-of-plumb wall tilts the level visibly off center — and that tilt means the glass panel, if cut at 90 degrees, will have a visible gap at either the top or bottom of the wall contact edge. Out-of-plumb walls require glass cut to a custom angle or additional sealing to accommodate the gap.
Checking plumb systematically:
Check each wall at three horizontal positions — near the floor, at the center height, and near the top. Walls can be plumb at one height and out of plumb at another (tile substrate issues, blocked wall framing, or settling).
Recording plumb deviation: Note which direction the wall leans and approximately how much. A wall that leans 1/4 inch over 72 inches of height is meaningfully out of plumb — visible in the finished installation. A wall that deviates only 1/16 inch over the same height is within normal construction tolerance and can be accommodated with seals.
What out-of-plumb walls mean for glass fabrication:
If the wall leans significantly toward the shower interior (bowing inward), the glass panel must be sized to the narrowest point or the panel will bind before seating correctly. If the wall leans away from the interior (bowing outward), there will be a gap between the glass and wall that must be sealed.
For severe out-of-plumb conditions (more than 1/2 inch over the full height), a professional field measurer should evaluate before fabrication. Custom-angle glass cuts or wall correction may be needed.
Measurement Differences for Corner and Neo-Angle Showers
Corner and neo-angle shower enclosures require additional measurements beyond the basic width-height-plumb checks. A standard corner shower needs the diagonal measurements of the opening to verify square. A neo-angle enclosure requires the width and angle of each panel opening, plus verification that the angled corner panels meet at the specified angles (typically 135 degrees for a standard neo-angle).
Corner shower additional measurements:
After measuring width and height on both panels, measure the two diagonals of the shower opening — from lower-left corner to upper-right corner, and from lower-right to upper-left. If the two diagonal measurements match (within 1/4 inch), the opening is square. If they differ significantly, the opening is not square and the glass must be fabricated to match the actual geometry.
1/4 inch
— the maximum acceptable difference between the two diagonal measurements of a shower opening for a truly square installation ([ANZZI](https://www.anzzi.com/))
Neo-angle additional measurements:
A neo-angle shower has five walls — two full side walls, two angled side panels, and one short angled front panel (the door opening). Each panel opening needs:
- Width at bottom, middle, and top
- Height at each end
- The angle of each angled wall (typically 135 degrees from the side wall, but verify — tile installation can shift this slightly)
For neo-angle showers, professional field measurement is especially important. The angular geometry means that small measurement errors compound across multiple panels, and a neo-angle enclosure fabricated from imprecise measurements is rarely fixable without replacing multiple panels.
Common Measurement Mistakes That Cause Fitting Problems
The most common measurement mistakes are: measuring before tile is installed, taking only one width measurement (missing out-of-plumb walls), and failing to account for door swing clearance. Any one of these can produce a panel that doesn't fit the finished opening.
Measuring before tile: The most expensive mistake. Tile and mortar bed add 3/4"–1-1/4" per wall. A shower measured on cement board and ordered immediately will be too wide by 1.5"–2.5" for the tiled opening. Wait until tile and grout are fully cured before measuring.
Single-point width measurement: Taking width at only one height assumes the walls are perfectly parallel. In most DFW homes, walls have some variation top-to-bottom from framing or tile substrate inconsistencies. A 1/4-inch variation across 72 inches of height is enough to cause binding.
Door swing not verified: For hinged or pivot frameless doors, the door must swing fully open without hitting the toilet, vanity, or opposite wall. Measure the door swing radius before specifying door width and swing direction. A door that works on paper but hits the toilet on opening is a problem discovered after installation.
Threshold position not confirmed: Whether the shower has a prefabricated curb, a custom stone threshold, or a zero-threshold design significantly affects the starting height of the glass. Confirm threshold material and height before measuring height.
Hardware placement not mapped: Hinge hole positions must be specified before fabrication — they are drilled in the untempered glass and cannot be changed afterward (GlassBuild America 2025). Map hinge locations from the finished tile surface, accounting for tile thickness and hinge setback specifications from the hardware manufacturer.
Why Custom Glass Companies Send a Professional Measurer
Professional glass companies send a trained technician to the job site before fabrication because the cost of a field measurement visit ($0 on most jobs in DFW) is far lower than the cost of a misfitted panel. A professional measurer catches out-of-plumb walls, non-square openings, clearance conflicts, and substrate problems that homeowner measurements consistently miss.
What a professional measurer does that a homeowner cannot easily replicate:
Substrate verification: The technician checks what's behind the tile at hardware mounting points — stud location, blocking, hollow tile areas — and confirms the anchor points will hold before glass is ordered.
Hardware template layout: Rather than measuring hole positions from a drawing, the technician physically positions a hardware template against the tile and marks the exact drill locations in the finished surface. This eliminates the single largest source of hole-placement errors.
Tolerance evaluation: The technician evaluates whether the wall conditions are within the range that standard glass fabrication and sealing can accommodate, or whether the conditions require special glass cuts, wall correction, or a design modification.
Opening condition documentation: Photos and notes of the finished opening condition become part of the job file — if a panel doesn't fit at installation, the documentation shows whether the opening changed between measurement and delivery (a possibility in active construction sites).
At Infinity Glass & Glazing, every custom shower project begins with a professional field measurement by our installation team — at no additional charge for projects in Corinth, Lewisville, Denton, Frisco, McKinney, Southlake, and surrounding DFW communities. We measure after tile is complete, map hardware positions with templates, and verify substrate integrity before fabrication begins.
- 1
Schedule Measurement After Tile Is Complete
Confirm tile, grout, and threshold are 100% finished and cured before scheduling. Measuring on unfinished surfaces guarantees incorrect dimensions. - 2
Measure Width at Three Heights
Bottom, middle, and top. Record all three. Use the smallest for your glass dimension. - 3
Measure Height at Three Horizontal Positions
Left, center, right. Note any variation — it indicates a sloping floor or threshold. - 4
Check Both Walls for Plumb
Use a 4-foot level vertically at three positions on each wall. Record the direction and magnitude of any deviation. - 5
Check Square With Diagonal Measurements
Measure both diagonals of the opening. They should match within 1/4 inch. Significant differences require glass cut to the actual geometry. - 6
Map Hardware Hole Positions
Use the hardware manufacturer's template to mark exact hinge, handle, and clamp hole locations on the tile surface. These positions are permanent once the glass is tempered.
Also see our article on why tempered glass cannot be cut after fabrication and our guide to common shower enclosure design mistakes to avoid.
Infinity Glass & Glazing provides complimentary professional field measurement on every custom shower door project across DFW. Contact us to schedule a measurement or call (940) 279-1197.
How accurate do shower door measurements need to be?
Custom frameless shower door measurements need to be accurate to 1/16 inch at minimum — and within 1/8 inch for all critical dimensions. Width measurements must capture the narrowest point of the opening across all measured heights. Height measurements must reflect the finished threshold-to-top dimension. Hardware hole positions must match the hinge manufacturer's specifications exactly. Errors larger than 1/8 inch consistently produce fitting problems — and since tempered glass cannot be cut after fabrication, a misfitted panel requires a full replacement.
Should you measure before or after tile work is done?
Always measure after tile work is complete and fully cured. Tile and mortar bed add 3/4" to 1-1/4" per tiled wall — measuring on cement board or drywall and ordering immediately will produce a panel that is too wide for the tiled opening by 1.5" to 2.5". This is one of the most expensive measurement mistakes in shower door projects. If you need a rough cost estimate before tile is installed, a glass company can provide a range based on framed opening dimensions — but final fabrication measurements must wait for completed tile.
What is the standard height for a frameless shower door?
Standard frameless shower heights run 72–76 inches from the threshold to the glass top for most residential configurations. Custom frameless installations can reach 84–96 inches for taller enclosures or floor-to-ceiling designs. The "standard" height is driven primarily by standard bathroom ceiling heights (8 feet) and common tile layouts rather than a single code requirement. For steam showers, which require a ceiling to contain steam, height is determined by the room ceiling, not a standard specification.
How do you measure for a corner shower enclosure?
A corner shower needs all the standard measurements (width at three heights on both panel openings, height at multiple points) plus diagonal measurements to verify the opening is square. Measure from the lower-left corner of the opening to the upper-right corner, then from lower-right to upper-left. The two diagonal measurements should match within 1/4 inch. A significant difference in diagonals means the opening is not square — the glass must be fabricated to match the actual geometry, not a theoretical square.
What happens if the walls aren't plumb when measuring?
Out-of-plumb walls require accommodations in fabrication or installation. A wall that leans toward the shower interior must be measured at its narrowest point (to ensure the panel fits), with the gap at the opposing edge sealed rather than filled with glass. A wall that leans away from the shower interior creates a gap between the glass and wall that must be sealed with a flexible shower seal. For walls out of plumb by more than 1/2 inch over the door height, the glass may need to be cut at a custom angle to reduce the gap — a detail the fabricator must know before cutting.
Related reading: